Enable Automated Emails in bizOS Lite
Automated emails, such as messages from your Contact Us page, order confirmations, and other notifications, require a properly configured email server in bizOS Lite.
Without setting up an email server, these automated messages will not be delivered to your users.
This guide will walk you through configuring an email server in bizOS Lite. We also provide example steps for popular providers like Gmail, Outlook, and others. Using these examples is optional and depends on your email service provider.
Once set up, your bizOS Lite platform will be able to send automated emails seamlessly, keeping your customers informed and engaged.
What You Need Before You Start
1.Login access to bizOS Lite
2. An email account from any provider
3. Provider-specific settings (SMTP server, port, username, password)
4. If using Gmail, Two-factor authentication (2FA) must be enabled
5. For Gmail, an App Password is required for security. Instructions are provided below as an example.
Follow these simple steps to set up outgoing emails in bizOS Lite.
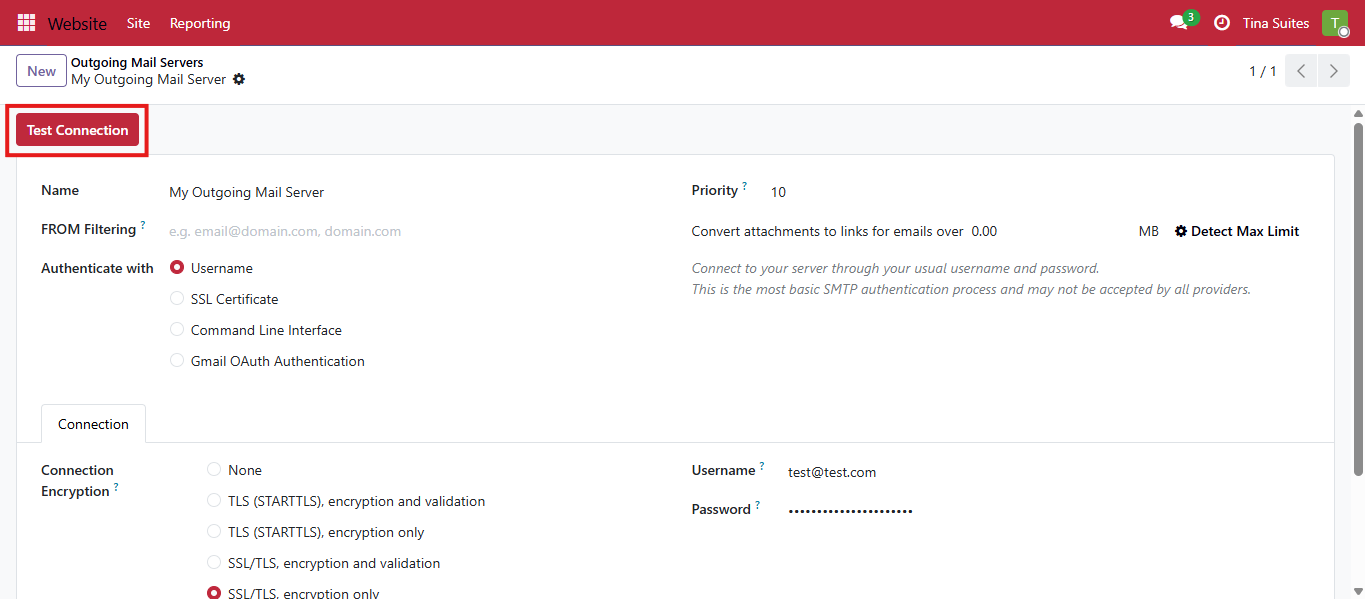
Step 1: Configure Outgoing Mail Server in bizOS Lite
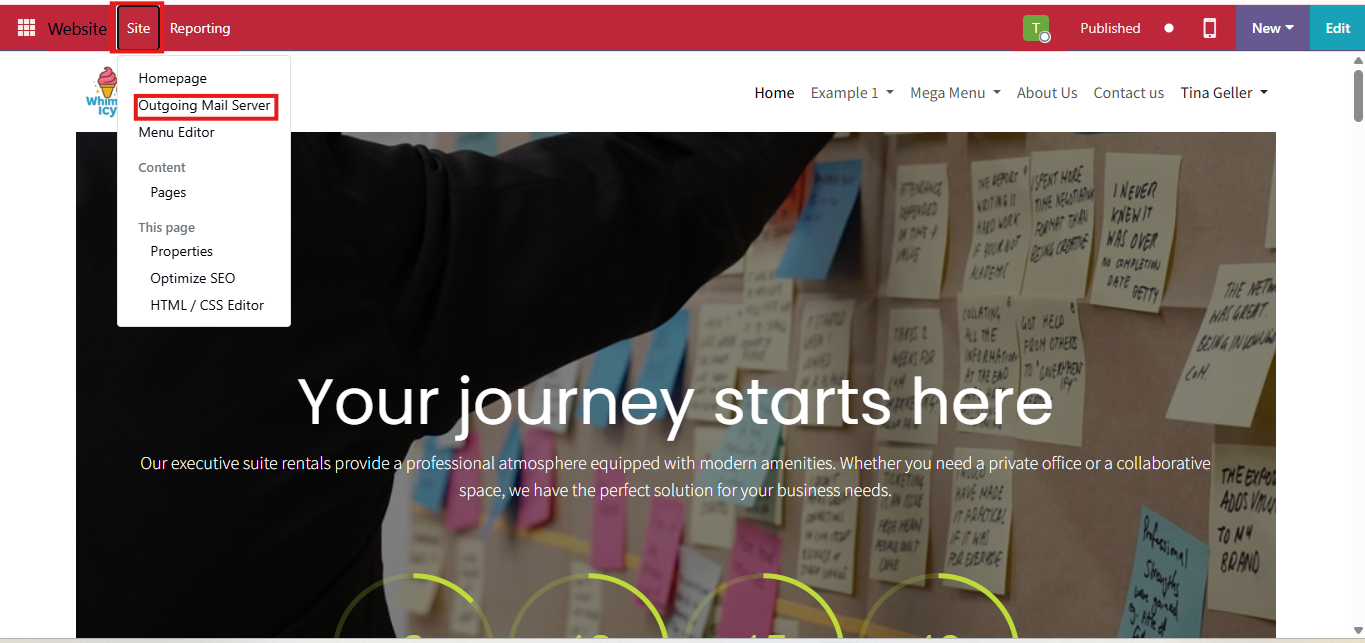
- Go to the Website editor mode and click on the Configuration menu. There, you will find Outgoing Mail Server.
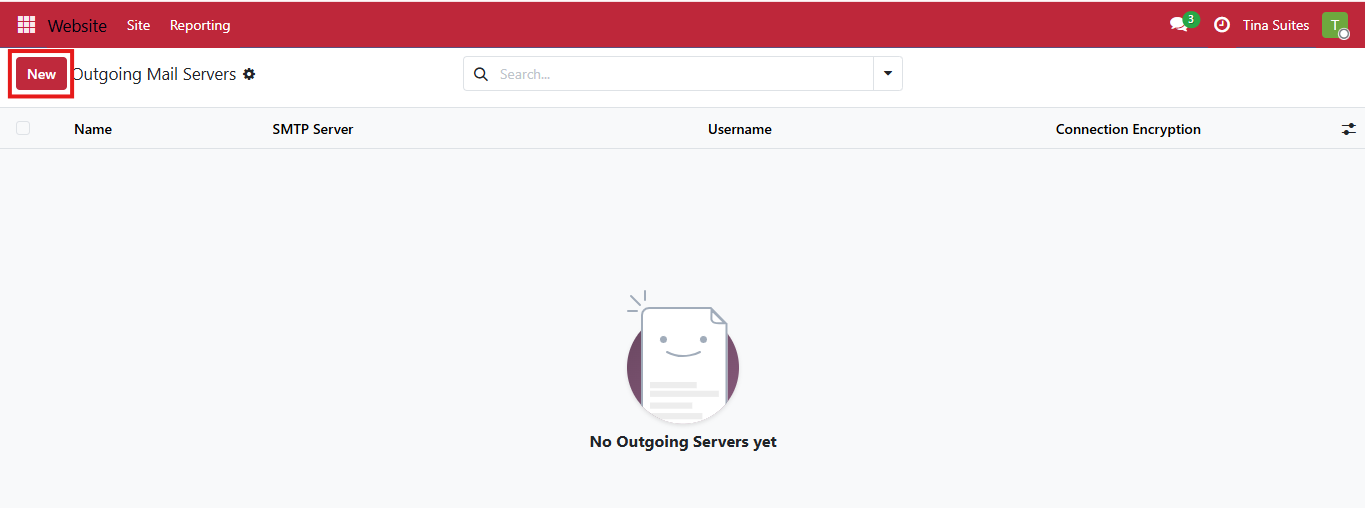
- Click on New to start setting for outgoing emails.
Step 2: Add Your Mail Server Details
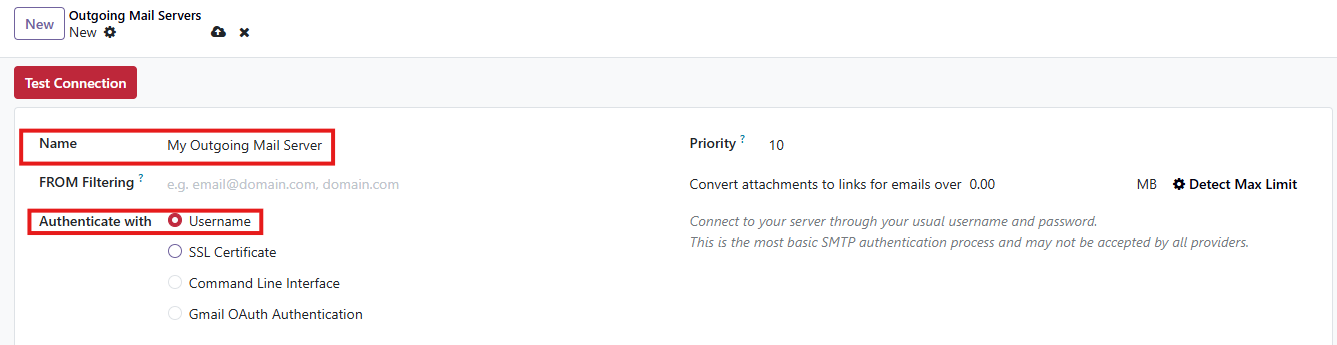
- Name: Any name you like (e.g., My Email Server)
- Authenticate With: Username (or as required by your email provider)
- Connection Encryption: SSL/TLS or as recommended by your provider.
- SMTP Server: Enter your email provider's SMTP server
- SMTP Port: Enter the SMTP port
- Username: Your email address
Note: The following example is for Gmail mail server setup.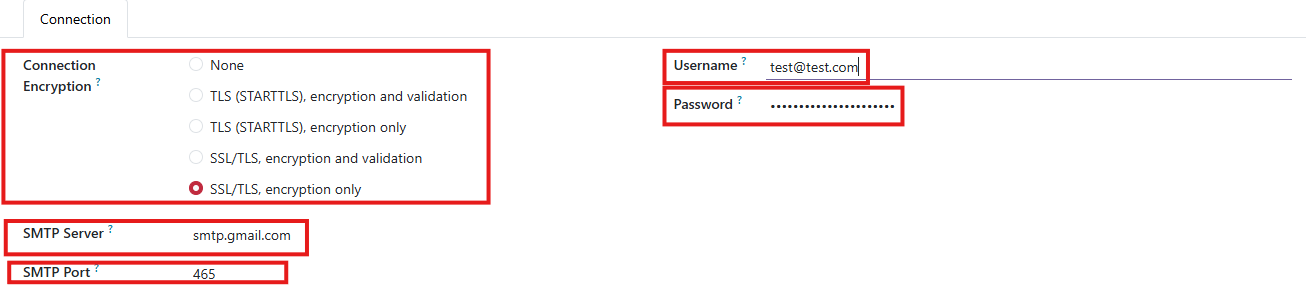
- Password: Your email account password (or App Password for providers like Gmail)
- Click Test Connection. If successful, the system will display: Connection Test Successful
Provider Specific Setup
Each email service provider has its own setup instructions available in their support resources. For example, Gmail, Outlook, and others provide detailed guides for configuring email servers.
To make things easier, we have summarized the setup process for Gmail here.
- Step 1: Log in to your Gmail account.
Step 2: Click on the Google Apps icon available on top-right corner.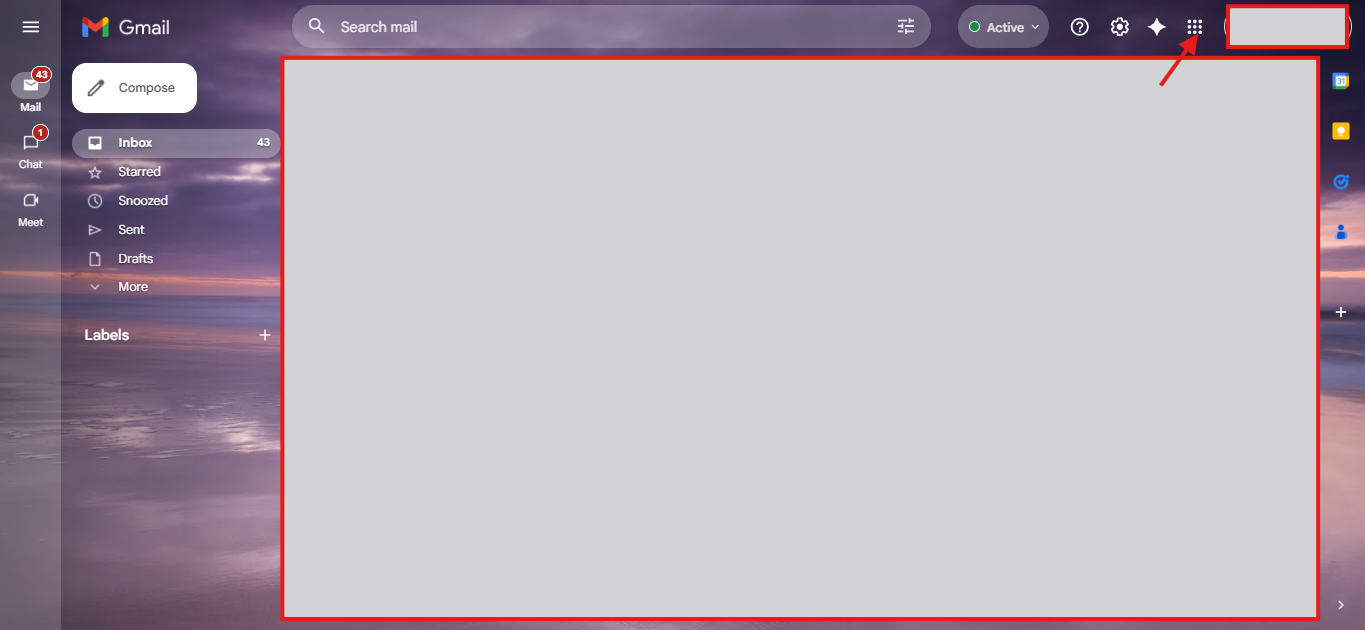
Step 3: Click on Account and open Security & Sign in.
Step 4: Search and open App Passwords.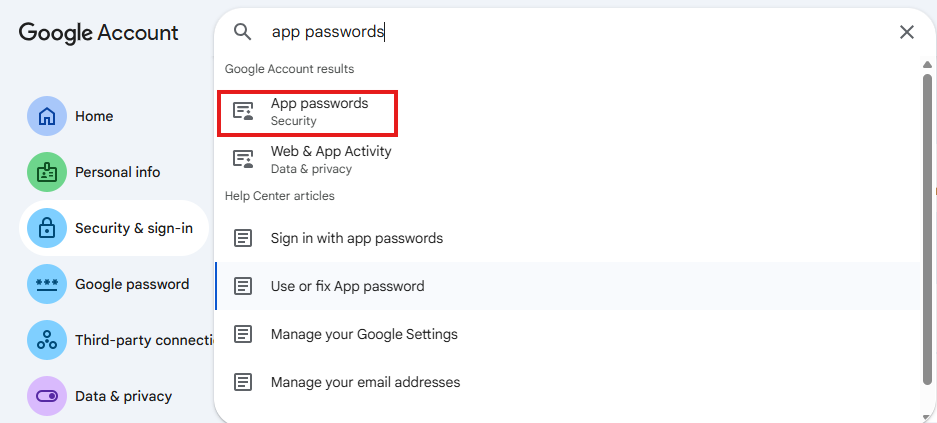
Step 5: Enter a name (e.g., bizOS Lite Emails) and click Create.
Step 6: Copy the generated App Password which you should use as the Password in bizOS Lite setuup (refer to the previous section).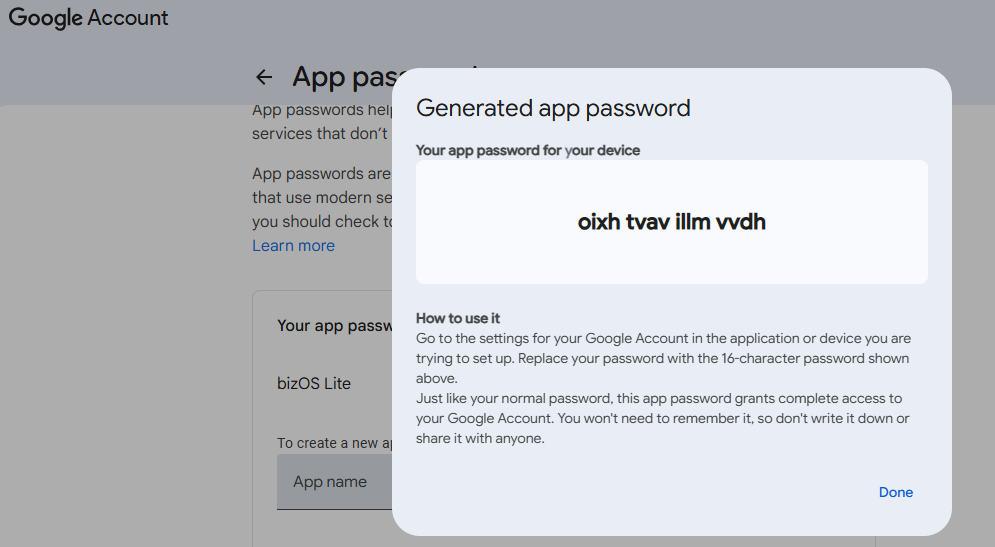
Once you have completed these steps, your email server will be configured and ready to send automated emails. Now your Contact Us messages, order confirmations, and other notifications will reach your customers reliably.
You can find additional resources and setup guides specific to your email service provider in their official documentation.
Learn More: